| SpaceEngineer | Date: Sunday, 17.06.2012, 11:01 | Message # 1 |
 Author of Space Engine
Group: Administrators
 Russian Federation
Messages: 4800
Status: Offline
| Last Updated: 2016/09/20 (version 0.9.8.0)
This manual describes how to add a 3D model of a galaxy or nebula to SpaceEngine. Before continue, it is recommended to read these manuals:
SE folders and pak files
Introduction to SE scripts
Creating galaxies, nebulae and star clusters
Current version of SpaceEngine (0.9.8.0) uses a sprites to render 3D models of galaxies and nebulae. They are very similar in format, thus their scripts are also very similar. There are many methods of creating models in SE, but they all are focused on creating a 3D distribution of sprites with various size and color. User can control it's shape and color by providing textures (image files) and specifying how to use them to create a 3D sprite model. Spiral galaxies also can use hi-resolution disk texture to enhance rendering quality when the galaxy is observed from top. The methods provided by SE are:
- Elliptical galaxies: uses a special ray-tracing shader, so they does not needed a 3D models.
- Spiral and lenticular galaxies: the "galaxy" method. Requires the high-resolution RGBA texture of the disk with dust pattern in the alpha channel, it's reduced version (128x128), and a hi-resolution RGB texture which maps distribution of blue stars, open star clusters and nebulae in the disk.
- Irregular galaxies and nebulae: various texture projection methods. Requires one to six RGBA textures, which represents view of the model from different sides (front, top, left and so on). Various applying methods are possible (cubic, cylindrical etc). Used to simulate real shape of irregular galaxy and any type of nebula.
- Irregular galaxies and nebulae: fully procedural fractal-based generation of a sprite distribution. Used for procedural irregular galaxy and any type of nebula.
To describe a galaxy/nebula model, we need these frontal/projection textures, and a model script. Textures for galaxies are stored in the virtual folder */textures/galaxies/, and for nebulae in the */textures/nebulae/. The model script is a file with extension *.cfg, located in the */models/galaxies/ or */models/nebulae/ for galaxies and nebulae, respectively.
To add a new galaxy model, go to the addons/models/galaxies/ folder and create a new text document there. Rename it to mymodel.sc (the file name doesn't matter, but make sure it doesn't match some existing file, otherwise you file will override it). Open it in the notepad and type this code:
Code GalaxyModel "MyGalaxyModel"
{
UseForObject "MyGalaxy" // name of the galaxy, for which this model must be used
UseForType "Sb" // type of galaxies, for which this model must be used
Method "SpiralGalaxy" // method of shape generation
Position (0 0 0) // offset of the sprite model
Radius (1.0 0.2 0.1) // disk radius, bulge radius, bulge thickness
BulgeRadius (1 1 1) // size of the bulge
BBoxRes (8 8 8) // resolution of the octree for sprites
floatLOD 0 // use or not continuous LOD? (0 = false)
LODbase 1 // LOD base
// paths to textures
FrontTexture "MyGalaxy.*"
SysTexture "MyGalaxy_sys.*"
FrontImage "MyGalaxy_small.*"
SideImage "Sa_side.*"
// resolution of the model (number of sprites multiplier)
// in radial and Z directions, respectively for
// emission, absorption and bulge sprites
emDetailR 1.0
emDetailZ 0.75
absDetailR 2.0
absDetailZ 0.5
bDetailR 0.75
bDetailZ 0.75
// colors of the emission, absorption and bulge sprites
emParticleColor (1.0 1.0 1.0)
absParticleColor (0.0 0.3 0.5)
bParticleColor (1.0 0.9 0.7)
// displacement of the emission, absorption and bulge sprites
emParticleDispR 0.25
emParticleDispZ 0.25
absParticleDispR 0.25
absParticleDispZ 0.5
bParticleDispR 0.2
bParticleDispZ 0.2
// size of the emission, absorption and bulge sprites,
// in the center and on the edge of the model
emParticleSizeCenter 2.0
emParticleSizeEdge 1.7
absParticleSizeCenter 1.5
absParticleSizeEdge 1.5
bParticleSizeCenter 1.0
bParticleSizeEdge 1.7
// cutoff brightness for the emission, absorption and bulge sprites,
// in the center and on the edge of the model
emParticleMinBrightCenter 0.5
emParticleMinBrightEdge 0.1
absParticleMinBrightCenter 0.0
absParticleMinBrightEdge 0.1
bParticleMinBrightCenter 1.0
bParticleMinBrightEdge 0.3
// brightness of the emission, absorption and bulge sprites,
// in the center and on the edge of the model
emParticleBrightnessCenter 0.1
emParticleBrightnessEdge 0.3
absParticleBrightnessCenter 5.0
absParticleBrightnessEdge 5.0
bParticleBrightnessCenter 0.15
bParticleBrightnessEdge 0.0
}
The nebula model can be described in the same way. Go to the addons/models/nebulae/ folder and create a new text document there. Rename it to mymodel.sc (the file name doesn't matter), open it in the notepad and type this code:
Code NebulaModel "MyNebulaModel"
{
UseForObject "MyNebula" // name of the nebula, for which this model must be used
UseForType "Diffuse" // type of nebulae, for which this model must be used
Method "CubeMap" // method of shape generation
Position (0 0 0) // offset of the sprite model
Radius (1 1 1) // sprite model scale
BBoxRes (4 4 4) // resolution of the octree for sprites
floatLOD 1 // use or not continuous LOD? (0 = false)
LODbase 50 // LOD base
// paths to textures (note: "neg" images are not used,
// in that case the "pos" textures are used for them)
CubePosXImage "MyNebula_posx.*"
CubePosYImage "MyNebula_posy.*"
CubePosZImage "MyNebula_posz.*"
// multiplier to the default resolution of the model
// in radial and Z directions, respectively for
// emission and absorption sprites
emDetailR 1.5
emDetailZ 1.5
absDetailR 1.5
absDetailZ 1.5
// colors of the emission and absorption sprites
emParticleColor (1.0 1.0 1.0)
absParticleColor (0.0 0.1 0.2)
// displacement of the emission and absorption sprites
emParticleDispR 0.5
emParticleDispZ 0.5
absParticleDispR 0.5
absParticleDispZ 0.5
// size of the emission and absorption sprites,
// in the center and on the edge of the model
emParticleSizeCenter 1.0
emParticleSizeEdge 2.0
absParticleSizeCenter 1.0
absParticleSizeEdge 1.0
// cutoff brightness for the emission and absorption sprites,
// in the center and on the edge of the model
emParticleMinBrightCenter 0.05
emParticleMinBrightEdge 0.05
absParticleMinBrightCenter 0.1
absParticleMinBrightEdge 0.1
// brightness of the emission and absorption sprites,
// in the center and on the edge of the model
emParticleBrightnessCenter 0.5
emParticleBrightnessEdge 0.5
absParticleBrightnessCenter 1.7
absParticleBrightnessEdge 1.7
// model bounding sphere radius and average color,
// updated by SpaceEngine automatically
clipRadius 0.928901
sumColor (254 9 4)
}
Keep in mind what you must describe a galaxy model in the cfg file which is located in the */models/galaxies/ folder, and a nebulae model - in the cfg file located in the */models/nebulae/ folder. Only these tags are allowed in the corresponding cfg files:
GalaxyModel "name" { } - add/modify a galaxy model in the galaxy model script,
NebulaModel "name" { } - add/modify a nebula model in the nebula model script.
Multiple model tags are allowed in the a single cfg file, as well as for SpaceEngine catalogs of astronomical objects. If there are two descriptions of the same model found in the cfg files (tags with the same name, for example, GalaxyModel "MilkyWay"), SpaceEngine will update the older script with the data found in the newer one. So you can modify an existing model by making a new cfg script with description of that model. Note: you must delete the binary file of the corresponding model from the cache to apply such update (see below).
The galaxy/nebula model script details
Here we will describe all parameters which can be used in model scripts for galaxies and nebulae. They are very similar, though some parameters are allowed only for certain type of object.
UseForObject - specifies for which particular object this model must be used.
UseForType - specifies for which type of objects (procedural or catalog with no model) this model must be used.
So you may choose one from 3 types of behaviour:
1) Model is used only for a galaxy/nebula, which name is specified in the UseForObject parameter. The UseForType parameter is not present. This method is useful for some peculiar galaxies like LMC or Hoag's object, which models you don't want to be used for other procedural galaxies/nebulae.
2) Model is procedurally assigned for a galaxies/nebulae which have no custom models, but have a type, specified in the UseForType parameter. The UseForObject parameter is not present. For example, if there are many models with UseForType "SBa", then all galaxies of "SBa" type will use randomly one of these models. This method is useful for "random" models, made from some art textures, not from a real photographs.
3) Model is used for a galaxy/nebula, which name is specified in the UseForObject parameter, and also procedurally assigned for a galaxies/nebulae which have a type specified in the UseForType parameter.
You must specify at least one of both parameters: UseForObject and/or UseForType.
Method - the method of generating three-dimensional distribution of sprites of the model. Valid values are:
"Cylindrical" - a cylindrical distribution: the side texture sets the density along the radius ® and height (Z), the front texture gives the density in the XY plane. Example: models of the LMC and SMC galaxies.
"Spherical" - a spherical distribution: the front texture rotates around the Y axis, and thus sets the density of the sprites. Example: model of the Owl Nebula.
"Flat" - a flat layer of sprites, the density is defined by the front texture.
"EllipticGalaxy" - elliptical distribution of sprites, textures are not used. Note what elliptical galaxies in SE uses a custom ray-tracing shader, so the sprite model is not needed for them.
"SpiralGalaxy" - a spiral galaxy, cylindrical method for the disc is used, and elliptical distribution for the bulge is used. Example: almost any model of spiral and lenticular galaxy.
"CubeMap" - the density distribution is defined by the six textures CubePosXImage ... CubePosZImage. These textures describes the projection of a model onto 6 faces of a cube circumscribing the model. The sprites density and colors are obtained by cubic interpolation between these face textures. If some pos/neg image is not provided, the corresponding neg/pos image will be used (so at least 3 images must be provided). Example: models of Carina nebula, Horsehead nebula.
"Diffuse" - a procedural cloud-like distribution, no textures are needed. Example: standard models for procedural diffuse nebulae "Diff0", "Diff1".
"Planetary" - a procedural spherical-shaped distribution. Example: standard models for procedural planetary nebulae "Plan0", "Plan1".
"SNR" - a procedural spherical-shaped distribution with thinner walls. Example: standard models for procedural planetary nebulae "SNR0", "SNR1".
Position, Radius, BulgeRadius - shifts and zooms the sprite model and its parts.
floatLOD, LODbase - sprite model LOD settings.
FrontTexture - the front texture of the galaxy. Rendered as a transparent textured square in the plane of the galactic disk, superimposed on the sprite model. It must have a dust pattern in the alpha channel (see Creating textures). RGB channels are determines the distribution and color of the emission sprites, and alpha channel - distribution of the dust sprites.
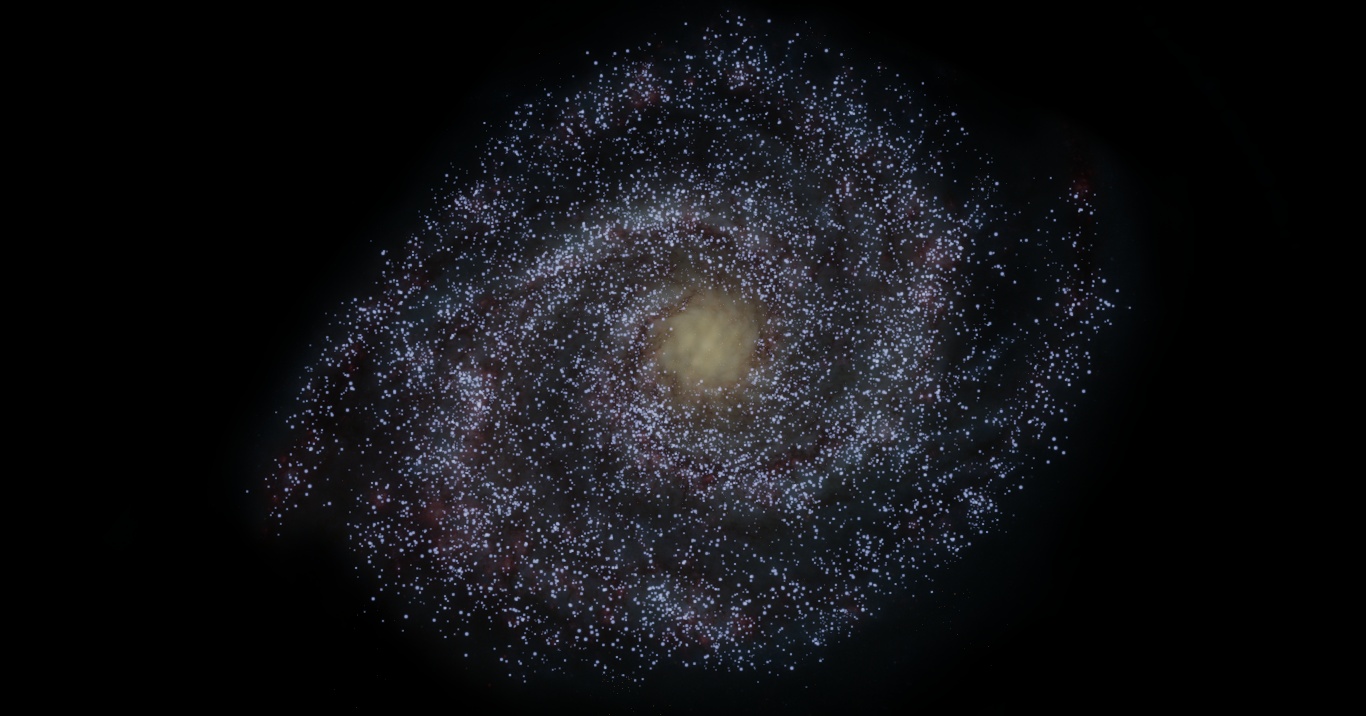
SysTexture - the texture of the subsystems of the galaxy, used to generate procedural objects in the galaxy. R, G and B channels are defines the distribution of nebulae, open star clusters and blue stars, respectively.
FrontImage, SideImage - textures of the galaxy/nebula in the frontal and lateral projections, used in the "Cylindrical" and "SpiralGalaxy" methods. For galaxies, the FrontImage must be a reduced to 128x128 copy of the FrontTexture, also with dust pattern in the alpha channel. The SideImage may be one of the following default side images, or the custom one:
S0_side.png, Sa_side.png, Sb_side.png, Sc_side.png, SBa_side.png, SBb_side.png, SBc_side.png
RGB channels are determines the distribution and color of the emission sprites, and alpha channel - distribution of the dust sprites.
CubePosXImage, CubePosYImage, CubePosZImage, CubeNegXImage, CubeNegYImage, CubeNegZImage - textures of a galaxy/nebula as viewed from 6 sides of a circumscribing cube. Used in the "CubeMap" method. RGB channels are determines the distribution and color of the emission sprites, and alpha channel - distribution of the dust sprites.
sumColor, clipRadius - these parameters are automatically updated by SpaceEngine when creating or updating the model. Used for nebulae. When you create a new model, it is necessary to add these parameters to the script, with any numbers as the initial values, for example:
sumColor (1 1 1) - overall color of the model,
clipRadius 1 - radius of the bounding sphere;
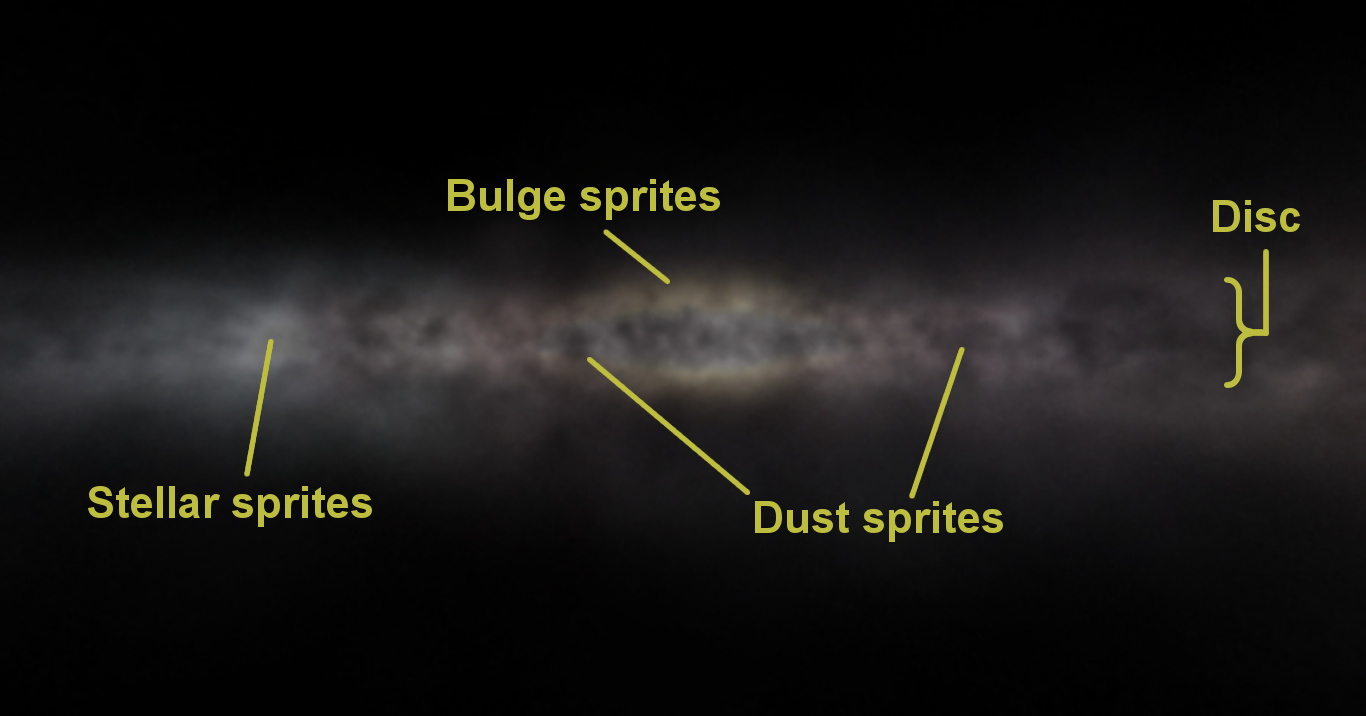
All of the following parameters have the same meaning for the sprites of the star disk of the galaxy or emission sprites of the nebula (prefix em), the dust sprites (prefix abs) and the galaxy bulge sprites (prefix b). For brevity, we will describe only the parameters for the emission sprites.
emParticleColor - the sprites color, modulates the color of the pixels in the textures. For the absorption (dust) sprites, values are amount of light absorption in the given channel. Good values are absParticleColor (0.0 0.3 0.5). This means (roughly) what sprite absorbs 50% of the passing light in the blue channel, 30% in the green channel, and 0% in the red channel.
emDetailR, emDetailZ - level of detail of the sprite model along the radius and the Z axis:
2.0 - 128 sprites,
1.0 - 64 sprites,
0.5 - 32 sprites, etc.
Note: setting a large number may hit the rendering performance very significantly!
emParticleDispR, emParticleDispZ - the magnitude of the random offset of a sprite from a rectangular grid, in the radial and the Z-axis directions:
1.0 - the width of the cell,
0.5 - half the width of the cell,
0.0 - no offset, etc.
Used to reduce the grid effect on the sprite model.
emParticleSizeCenter, emParticleSizeEdge - sprite size at the center and the edge of the model:
1.0 - sprite diameter is equal to the width of the cell,
2.0 - sprite diameter is 2 times greater than the width of the cell, etc.
The size of sprites interpolates linearly from the center to the edge.
emParticleMinBrightCenter, emParticleMinBrightEdge - the minimum brightness of the generated sprite to include it to the model (at the center and the edge of the model). Interpolates linearly from the center to the edge. If the value in the density map built using textures or procedural noise is less than this value, then the sprite in this cell is skipped. Used for optimization of the model - very dark and black (invisible) sprites are got excluded.
emParticleBrightnessCenter, emParticleBrightnessEdge - sprite brightness at the center and the edge of the model. Interpolates linearly from the center to the edge.
emNoiseRandomize ... emNoiseOffset - parameters of the noise function (Distorted fBm), which is used in the "Diffuse" method of generation (irregular galaxies and nebulae):
emNoiseRandomize - seed for the generator,
emNoiseFreq - noise frequency,
emNoiseOctaves - number of noise octaves,
emNoiseDistort - amplitude of the distortion,
emNoiseLacunarity - lacunarity (heterogeneity),
emNoiseH - the parameter H,
emNoiseOffset - the shift.
Updating the model in runtime
When first approaching the created galaxy, SpaceEngine creates a sprite model, using data from the model script and textures specified in it. The generated model is saved in a special binary format to the cache folder cache/models/galaxies/*.gm (for galaxies) or cache/models/nebulae/*.nm (for nebulae) and a name that matches the name of the model tag. The next time you load SpaceEngine, it will load the binary file from the cache, instead of generating the model again, which is much more faster. If you remove the model file from the cache, it will be generated again using scripts and textures.
You can change the script and textures of the model while running SpaceEngine, and update the model on-the-fly. To do this, you should select the galaxy or nebula you wish to edit, switch to the Edit mode (press the [ * ] key twice), and press [Ctrl]-[Shift]-[F5]. The model of the currently selected galaxy or nebula will be updated and saved to the cache.
If there is any error while generating or updating the model and the galaxy/nebula disappears in SpaceEngine, you will need to remove the model from the cache manually and restart SpaceEngine.
Creating textures
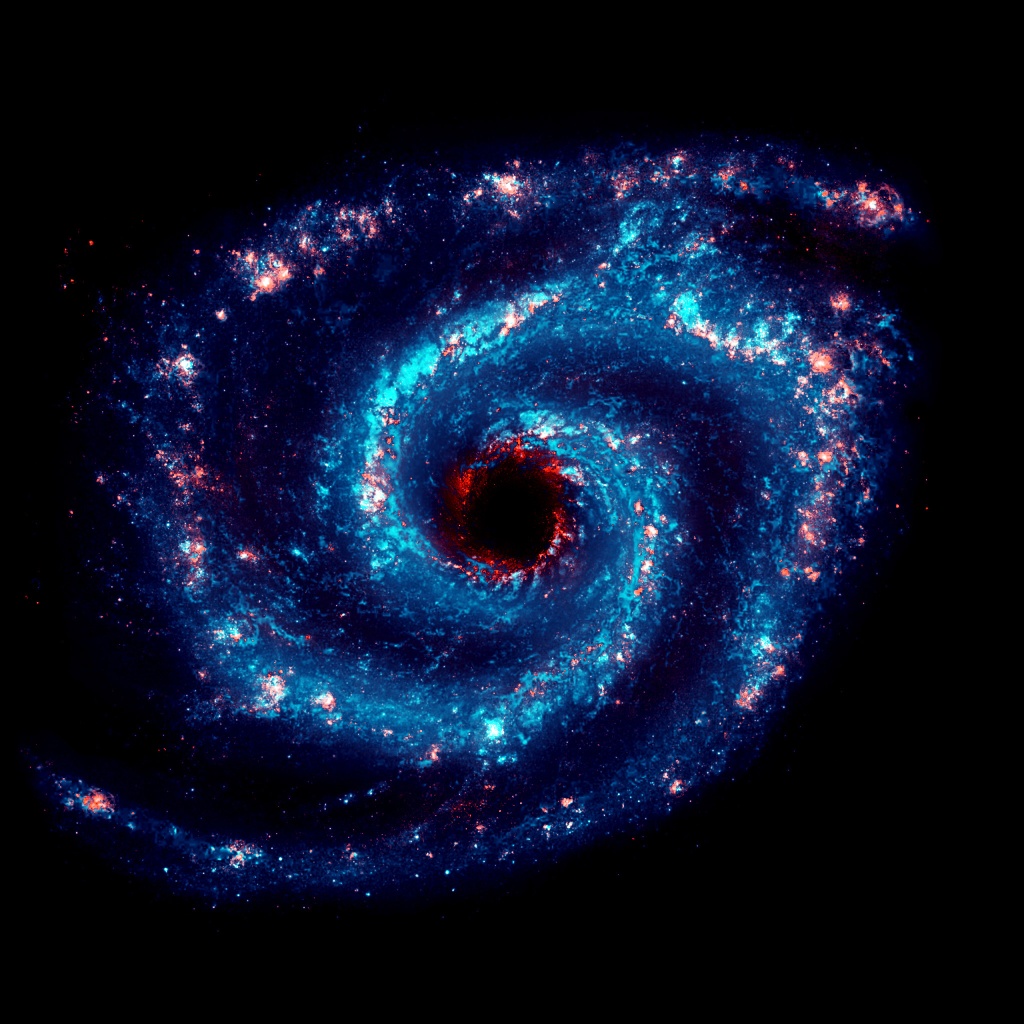
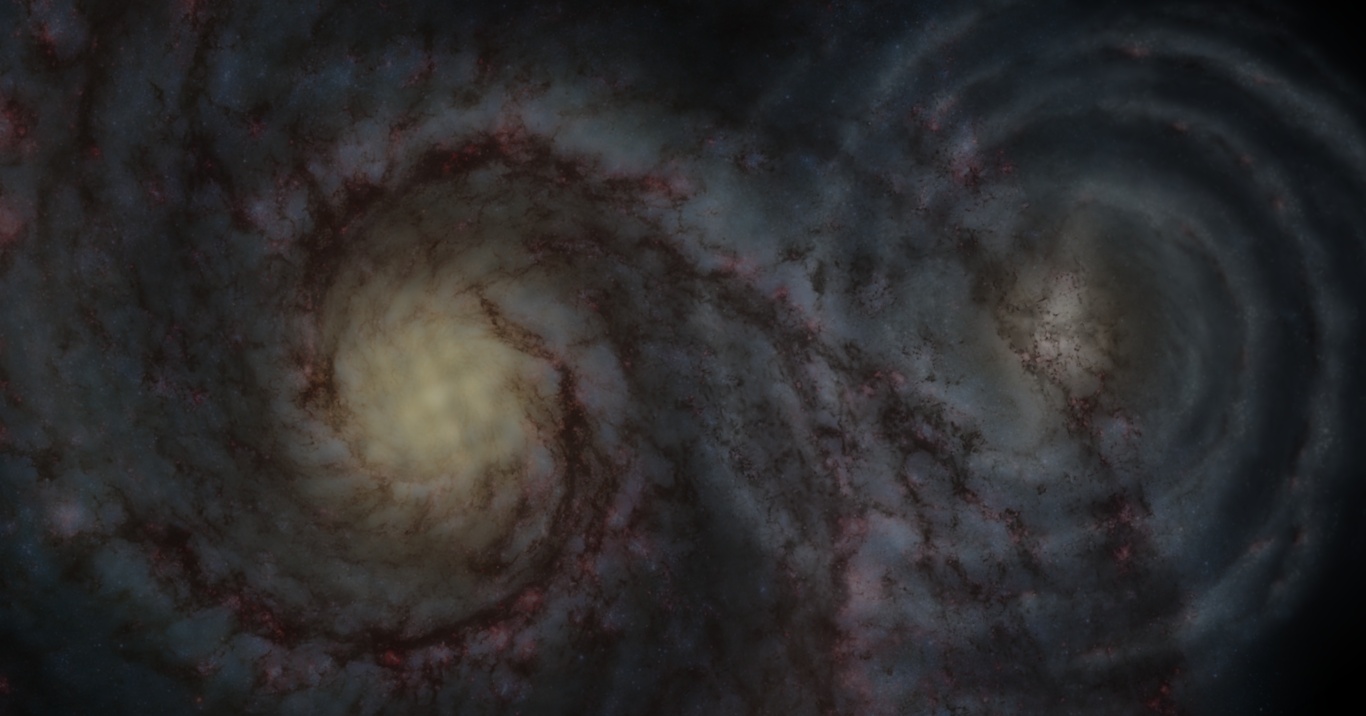
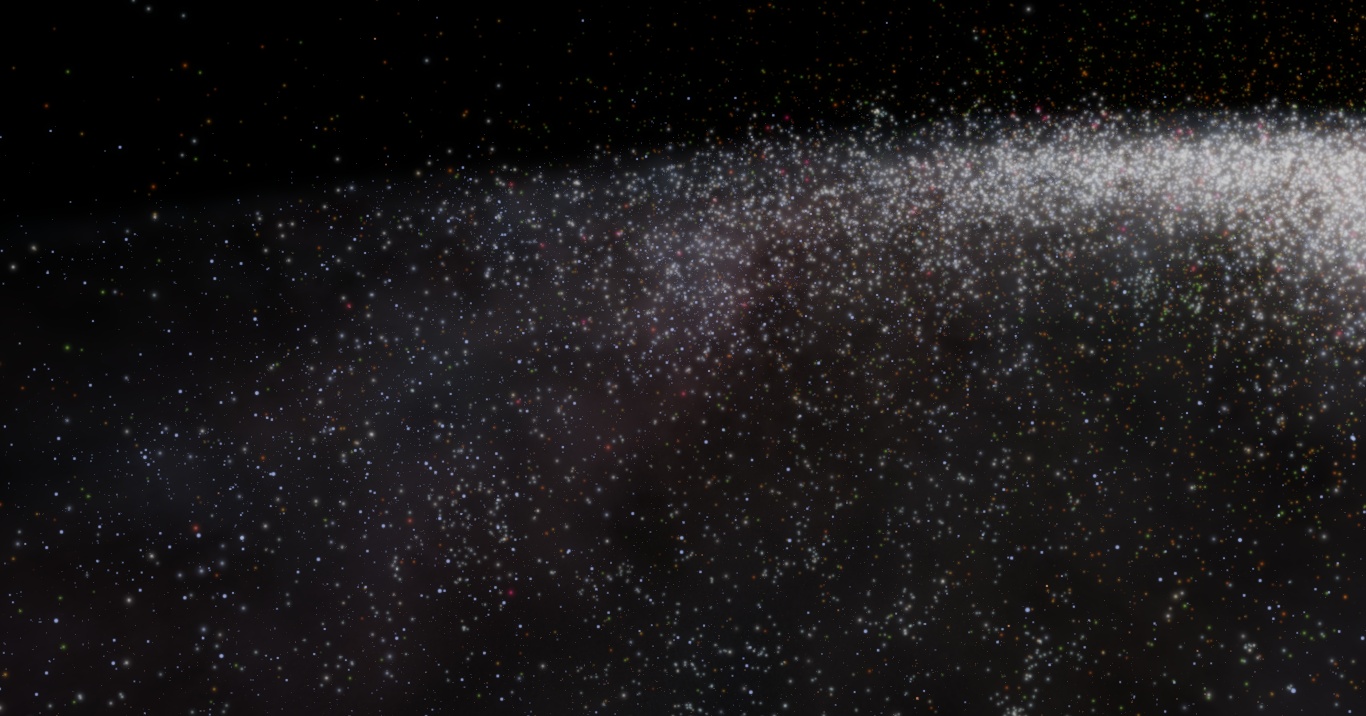
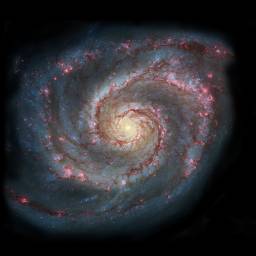
Lets look for example on textures of the M 51 galaxy. It is made based on the Hubble photo of this galaxy (similar to this). Here is a description of steps needed to make a good textures for SpaceEngine from this photo. Textures for nebulae can be made in similar way.
1) The first step is cropping, centering and resizing of the image to nearest power-of-two dimensions. Make it a square with a side of 512, 1024, 2048, 4096 pixels. The higher the resolution, the better. The limit is 4096. Make the texture so that the galaxy is almost fully filled it. There should be a minimum of unused space around the edges, and the center of the texture should coincide with the center of the galaxy. If the galaxy is seen in the photo slightly at an angle, stretch the image so that it becomes circular (if it is known that it does not feature the actual shape of the galaxy).
2) The next step is removing of the background stars (which this image almost doesn't have, luckily). In the Photoshop, one tool for removing stars can be Filter -> Noise -> Dust & Scratches. Another possible way is to copy of the original texture layer twice, blur the top layer (Filter -> Gauss blur, or Box blur), and use a Difference blending mode for second layer. This isolates small details - the stars. Then merge the top two layers and set a Difference blending mode for the merged layer. This makes small details to be subtracted from the lower (original) layer. Then use the tool Image -> Adjustments -> Levels to pick up the black level of the upper layer to more precise subtraction of the stars. The brightest stars should be removed manually by copying the neighboring areas of the image (eg. with the Clone Stamp Tool). There is some noise left after removing the stars, and it must be smoothed out in some way, for example by walking through image with a Blur tool, leaving the dust/nebula details where they should be, but smoothing out the noise from removed stars.
3) Increase the contrast of the image, and attenuate (fade) the edges. It must completely fade to black on the edges, otherwise edges will be very noticeable in SpaceEngine. Here is the example of what you must achieve (click to enlarge):
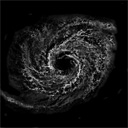
4) Next step is selecting the interstellar dust pattern. Dust is a brown streaks visible on the galaxy's spiral arms. Near the center you can see how they gradually disappears into a yellow "fog" - a spherical bulge of the galaxy. Select the dust like you selected the stars, or use the tool Select -> Color Range. Create the alpha channel and copy selected dust there. Bright areas in the alpha channel must outline the dust in the galaxy, so you may need to invert the image. Here is the example of what you must achieve in the alpha channel (click to enlarge):
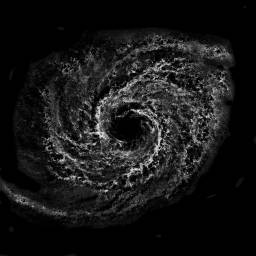
5) Create the small version of this texture. It is just a reduced to 128 x 128 copy of the front texture. It is used as "LOD 0" texture if the galaxy is far away, and also for generating the 3D sprite model. Note: Photoshop likes to add a thin gray frame around the image while rescaling. So make sure you have removed it with eraser tool or other method. Look at the small texture example below: its alpha channel have noticeable frame. If not removed, these gray pixels may lead to generating of redundant sprites in the 3D model.

6) Now it's time to create a subsystems texture. Create a new document (image) with the same dimensions as the edited (big) front texture. Then copy RGB image of the front texture into that new document. The subsystems texture is a pattern which is used to generate procedural diffuse nebulae (the red channel), open star clusters (green channel) and the young blue stars (blue channel). So it can easily be made by adjusting the levels/contrast in each of the color channels separately. You also need to erase the galaxy core - there must be no nebulae, star clusters, and blue giants generated. You can use the hand tools Burn and Dodge to enhance star forming regions (in the blue channel) and nebulae (in the red channel). If galaxy image have no very well defined nebulae, you can copy the dust distribution map to the red channel and (nebulae appear near dust clouds). Here is the example of what you must achieve (click to enlarge):
7) Save the files. It is recommended to save the front texture and it's small version into the alpha-PNG format. Note: Photoshop can't save PNG with the alpha channel, so it is better to save the texture in TGA format, and then convert it to PNG using SpaceEngine. It have an option for convert any texture to any supported format with correct saving of the alpha channel. To use it, run SpaceEngine, open the console with [~] key and type there:
SavePNG addons/textures/galaxies/MyGalaxy.tga
where MyGalaxy.tga is a file name of the texture you want to convert. This command loads the texture MyGalaxy.tga and saves it with name MyGalaxy.png to the same folder. There are commands for converting to all other formats available: SaveJPG, SaveDDS, SaveTGA, SavePNG, SaveTIF.
The subsystems texture can be saved in any format, including JPEGб because it does not have an alpha-channel.
8) You can edit the model script and textures while running SpaceEngine, and update the model on-the-fly. To do this, select the galaxy you are editing, switch to the Edit mode (hit the [ * ] key twice), and press [Ctrl]-[Shift]-[F5]. The model of the galaxy that is currently selected will be updated.
Good photos of galaxies can be taken from the Hubble website. Choose the galaxies which have full coverage in the frame, on images which was taken in the visible light in natural color. It is better to grab photos in TIFF format without compression so there will not be JPEG compression artifacts.
|
| |
| |
 ENG
ENG


 Russian Federation